

Skalieren Sie Ihre visuelle Entwicklung global ohne Backend-Code.
Webflow ist die führende Plattform für visuelle Entwicklung, aber native Lokalisierung kann komplex und teuer sein. MultiLipi integriert sich über eine einzige Skript-Injektion direkt in die Architektur von Webflow und verwandelt Ihre statischen Seiten und CMS-Kollektionen sofort in eine mehrsprachige Infrastruktur mit vollständiger SEO-Indizierung.
Diese Anleitung beschreibt den Integrationsprozess mit dem Benutzerdefinierter Code Funktion.
1. Voraussetzungen für die Bereitstellung
Stellen Sie vor Beginn sicher, dass Ihre Umgebung die Anforderungen erfüllt:
Webflow-Website-Plan
Sie müssen sich auf einer Basic Site Plan (oder höher), um die Funktion "Custom Code" freizuschalten.
MultiLipi API-Schlüssel
Finden Sie dies in Ihrem Dashboard unter Einstellungen > Allgemein.
2. Schritt 1: Zugriff auf die Website-Architektur
Wir werden die Übersetzungs-Engine in die globale Kopfzeile einfügen, um sicherzustellen, dass sie auf allen Seiten und CMS-Vorlagen bestehen bleibt.
- 1
Melden Sie sich bei Ihrem Webflow Dashboard.
- 2
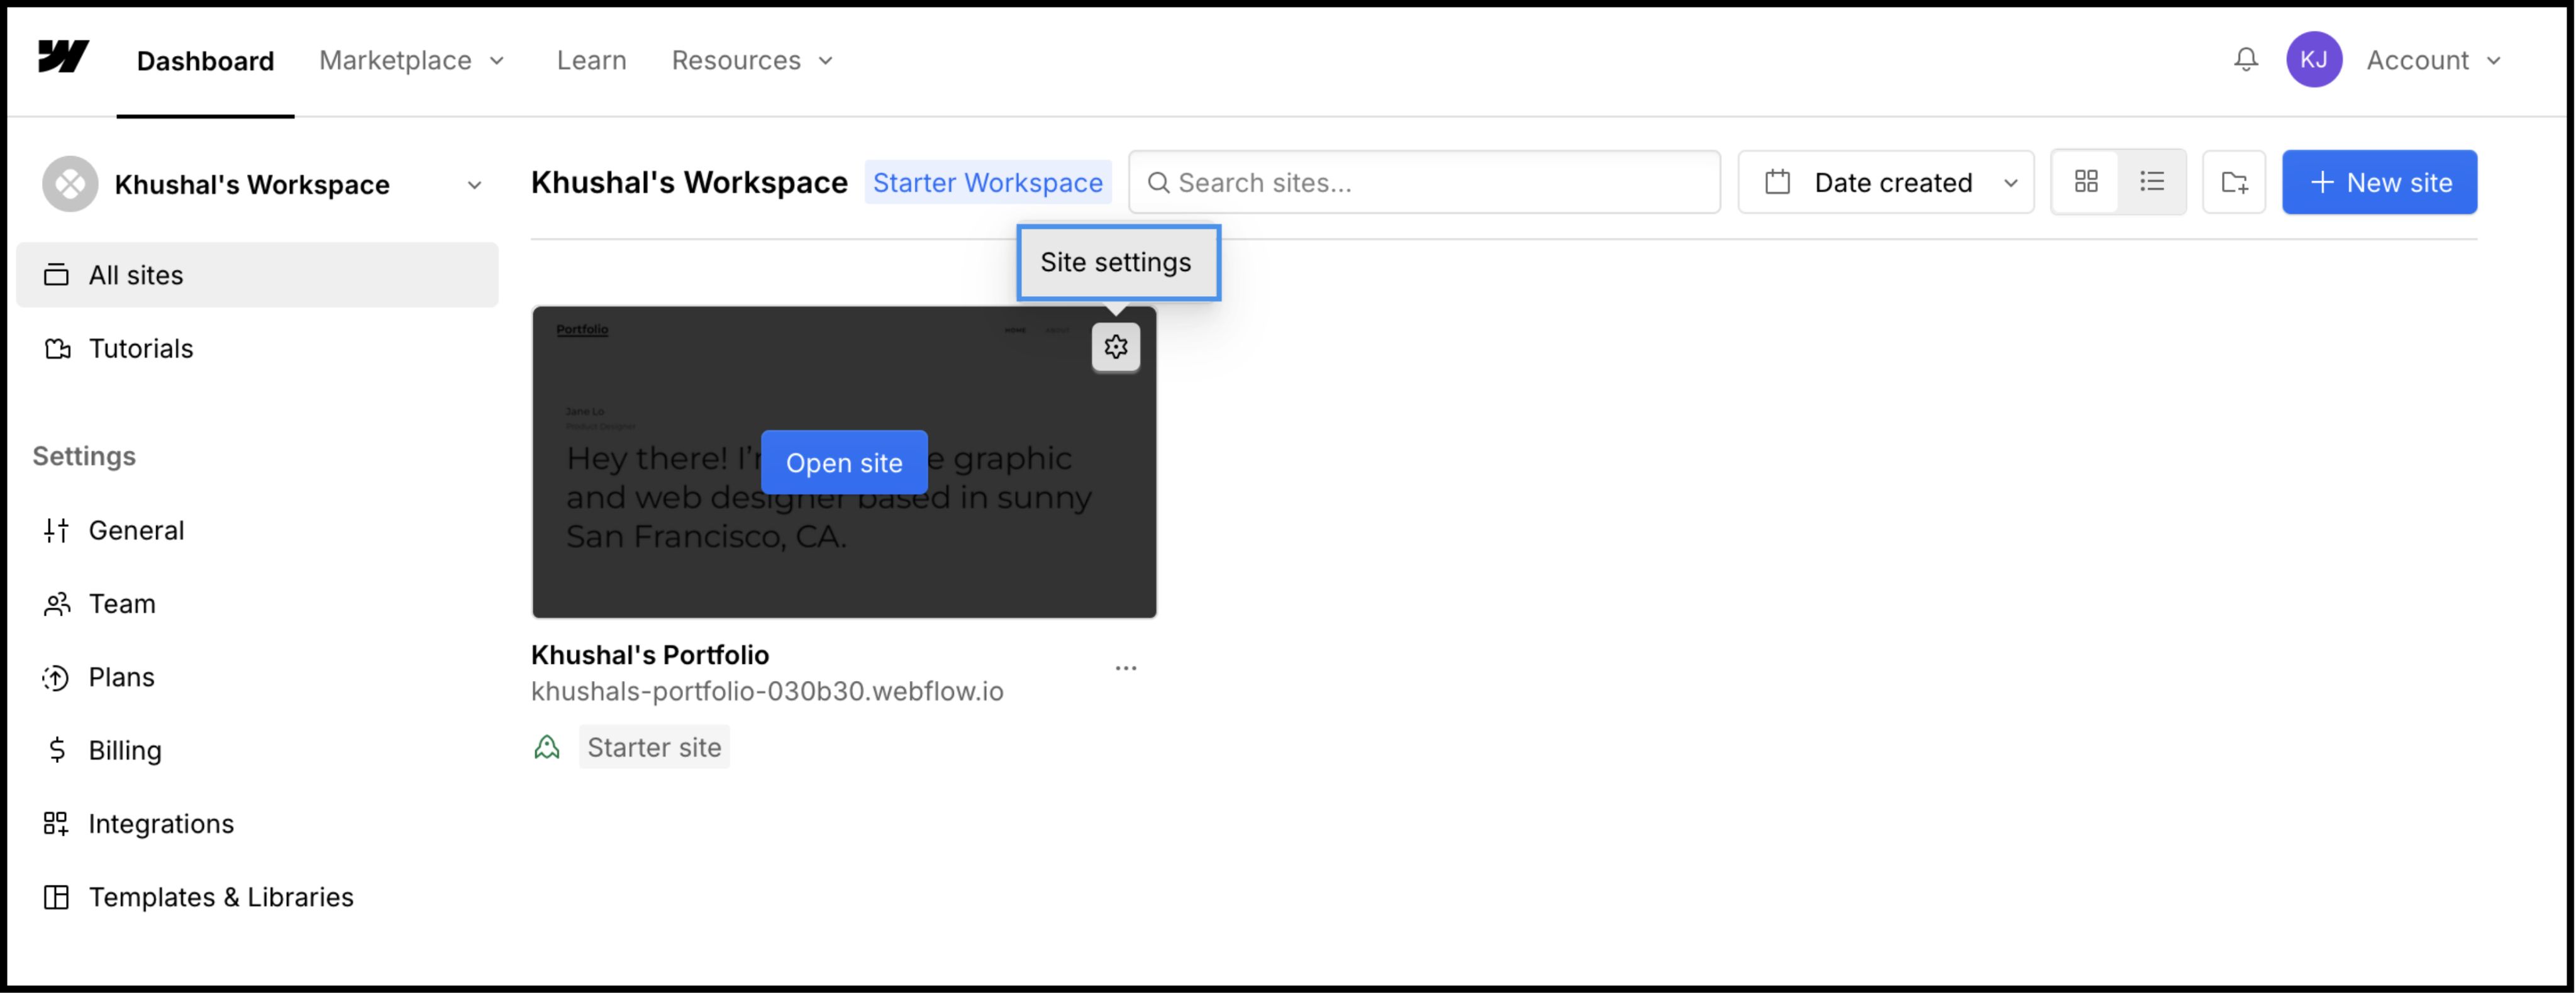
Suchen Sie Ihre Projektkarte und klicken Sie auf die Einstellungen-Symbol (⚙️) (oder wählen Sie Website-Einstellungen aus dem Designer-Menü).
- 3
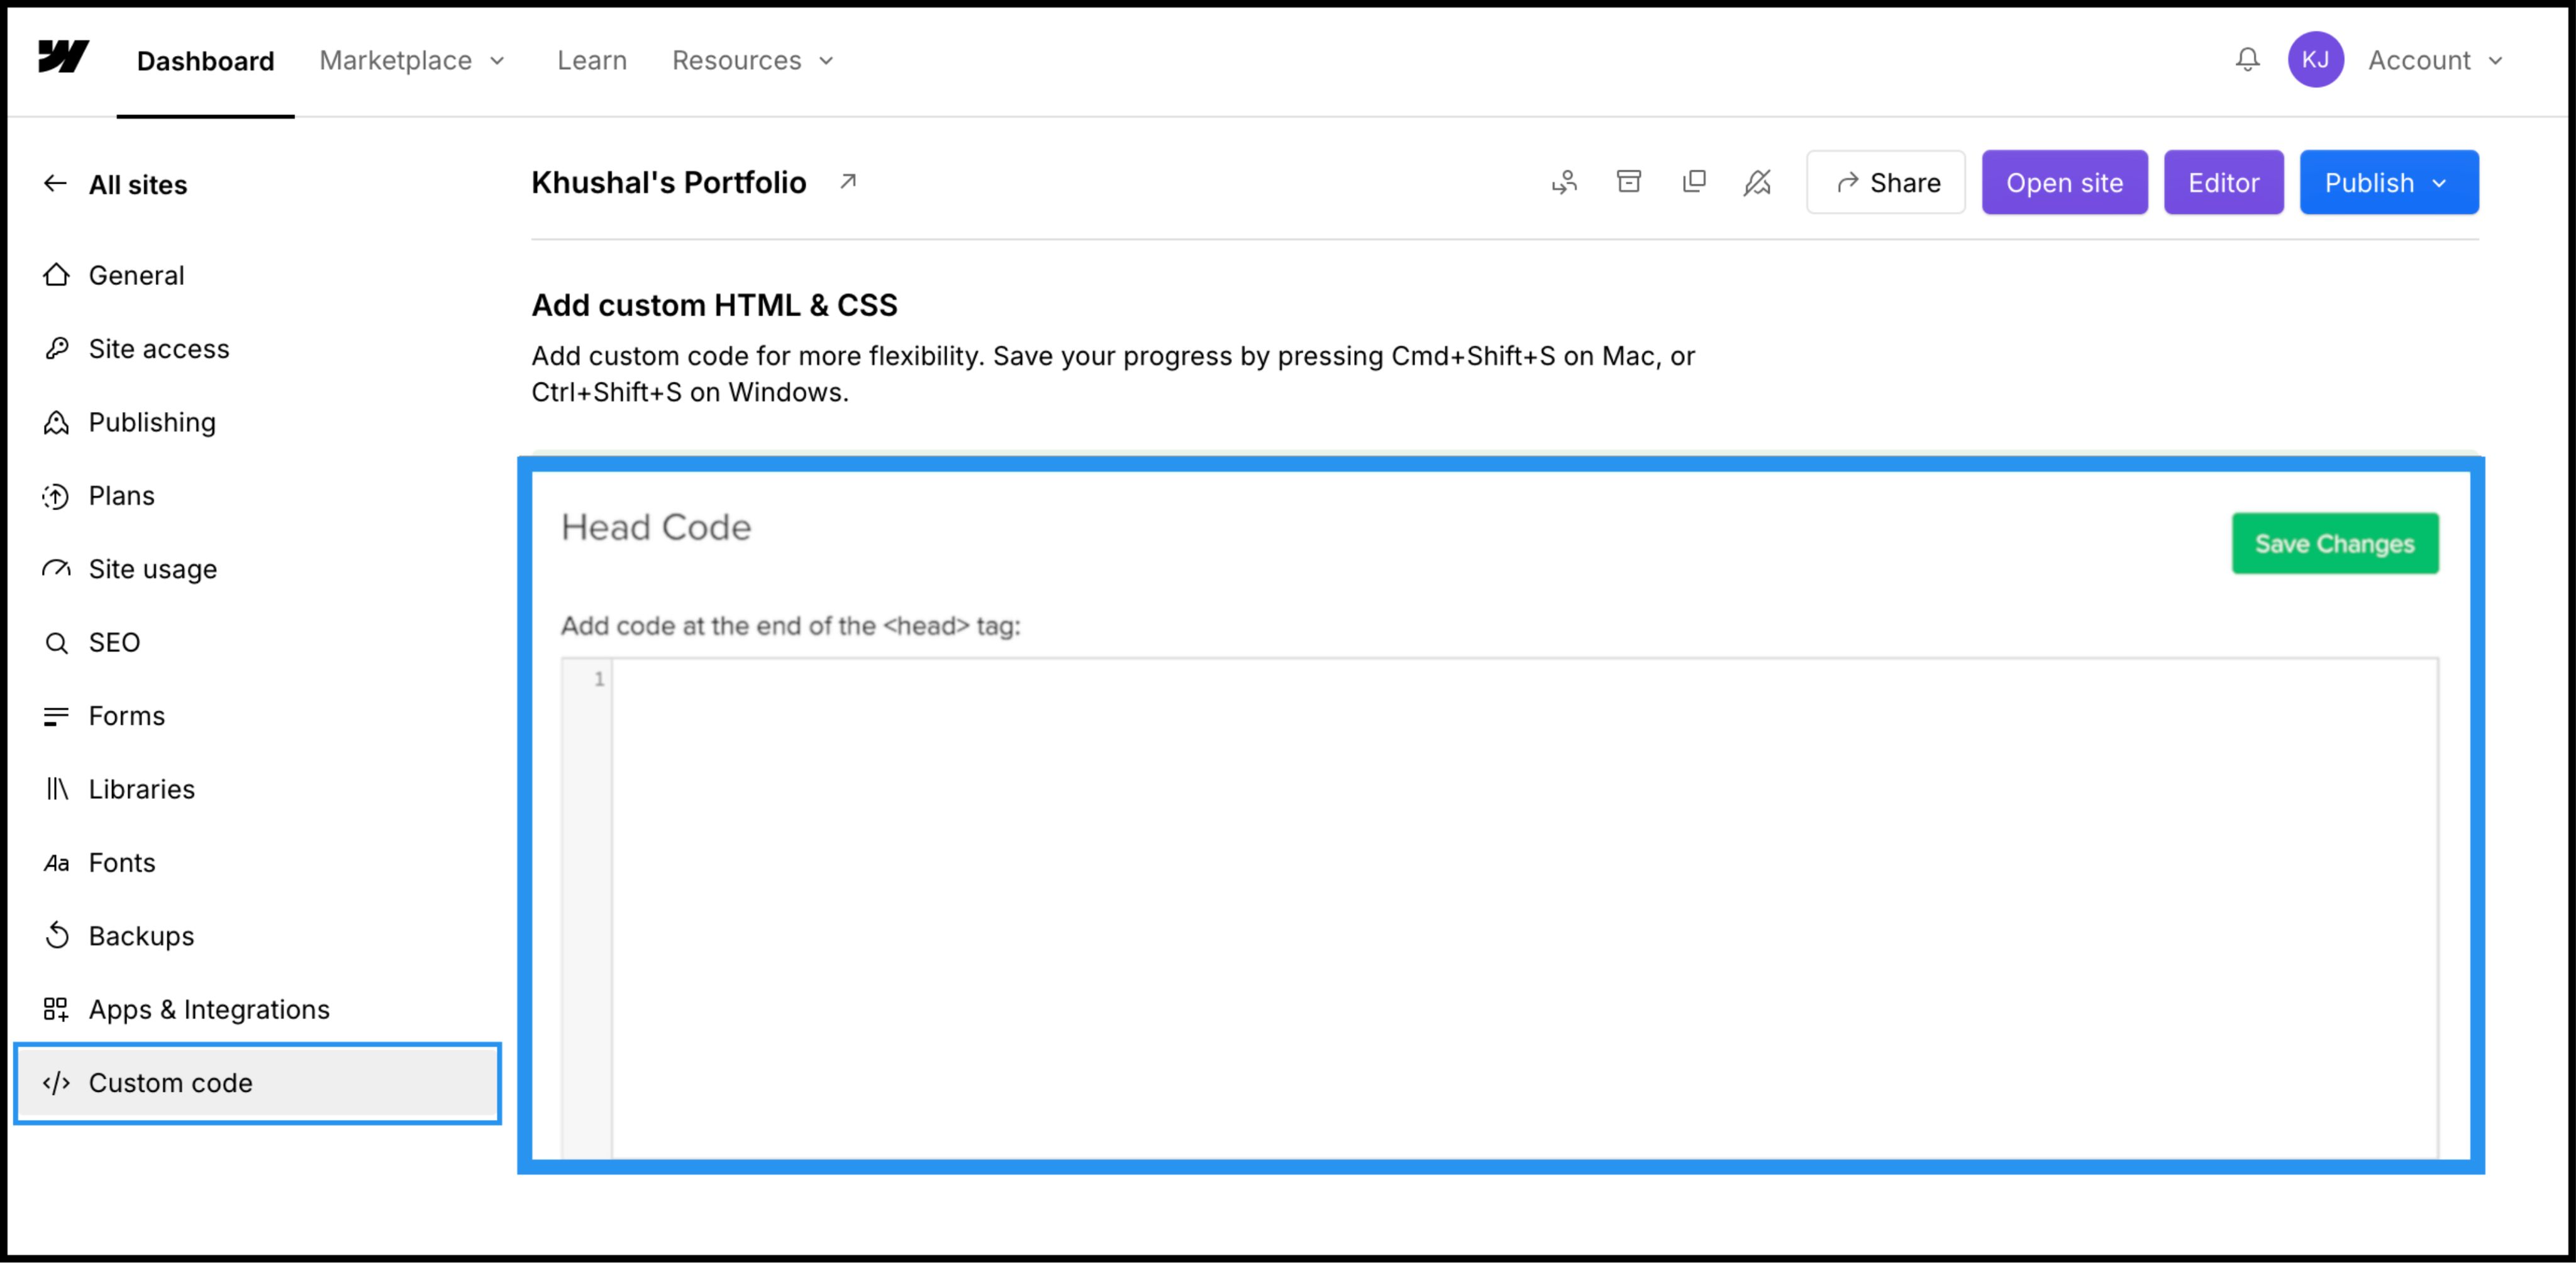
Navigieren Sie zur Benutzerdefinierter Code Tab in der oberen Navigationsleiste.
3. Schritt 2: Skript-Infrastruktur einfügen
- 1
Scrollen Sie nach unten zu dem Feld mit der Bezeichnung "Head Code".
- 2
Hinweis: Platzieren Sie dies nicht im "Footer Code", da dies das Laden der Übersetzung verzögert und einen "Flash of untranslated content" (Aufblitzen von nicht übersetztem Inhalt) verursacht.
Aktion: Verbindungs-Skript einfügen
Fügen Sie das folgende Verbindungsskript in das Feld ein:
⚠️ Kritische Konfiguration
- •Ersetzen
IHR_API_SCHLÜSSEL_HIERmit dem tatsächlichen API-Schlüssel, der von deinem MultiLipi-Dashboard kopiert wurde. - •Klicken Sie auf das grüne Änderungen speichern Schaltfläche in der oberen rechten Ecke.
4. Schritt 3: Bereitstellung & Verifizierung
Webflow führt keinen benutzerdefinierten Code in der Designer-Ansicht aus. Sie müssen veröffentlichen, um die Engine in Aktion zu sehen.
Veröffentlichen
Klicken Sie auf das Blaue Veröffentlichen Schaltfläche und wählen Sie Ihre Produktionsdomäne (oder .webflow.io Staging-Domain).
Überprüfen
Öffnen Sie den Live-Link.
Visuelle Prüfung
Der Sprachumschalter sollte unten links erscheinen.
CMS-Prüfung
Navigieren Sie zu einer CMS-Collection-Seite (z. B. /blog/post-1) und wechseln Sie die Sprachen, um sicherzustellen, dass dynamische Inhalte korrekt übersetzt werden.
Fehlerbehebungsprotokoll
- •Fehlt der Umschalter? Bestätigen Sie, dass Sie die Website nach dem Speichern des Codes veröffentlicht haben.
- •Plan-Prüfung: Stellen Sie sicher, dass Ihr Webflow-Hostingplan aktiv ist; kostenlose Staging-Websites schränken oft die Ausführung von benutzerdefiniertem Code auf benutzerdefinierten Domains ein.
5. Optimierung & Styling
Nach der Bereitstellung arbeitet MultiLipi geräuschlos im Hintergrund.
Design-Integrität
Da wir nur Textknoten austauschen, bleiben Ihre Webflow-Interaktionen (IX2) und Scroll-Animationen perfekt erhalten.
Switcher-Anpassung
Sie können den Umschalter über unsere Dashboard-Einstellungen neu positionieren oder seine CSS überschreiben, um sie an die spezifische Typografie Ihrer Website anzupassen.
SEO-Automatisierung
Wir generieren automatisch die sitemap.xml Einträge und hreflang Tags für Ihr Webflow-Projekt, damit Sie in globalen Suchergebnissen ranken, ohne manuelle SEO-Arbeit.