

Bereitstellung von MultiLipi auf Shopify
Transformieren Sie Ihr Ladenlokal in eine globale Verkaufsmaschine.
Shopify ist für den Handel konzipiert, aber eine echte globale Skala erfordert mehr als nur die Währungsumrechnung. Durch die Integration von MultiLipi setzt man eine Neuronale Übersetzungsinfrastruktur das Ihre gesamte Ladenfront lokalisiert – von Produktbeschreibungen bis zu den Checkout-Flows – und automatisch die komplexen SEO-Signale verarbeitet, die für die Bewertung Ihrer Produkte in ausländischen Märkten erforderlich sind.
Dieser Leitfaden beschreibt den Integrationsprozess mit Shopify theme.liquid Architektur.
1. Einsatzvoraussetzungen
Bevor du dein Thema änderst, stelle sicher, dass du folgende Qualifikationen hast:
MultiLipi API Key
Finden Sie dies in Ihrem Dashboard unter Einstellungen > Allgemein .
Shopify-Admin-Zugriff
Du musst Berechtigungen haben, um Themes zu bearbeiten.
2. Schritt 1: Zugriff auf die Theme-Architektur
Wir werden die Übersetzungs-Engine direkt in die globale Layout-Datei Ihres Shops einfügen, um sicherzustellen, dass sie auf jeder Seite (Produkte, Sammlungen, Seiten) geladen wird.
- 1
Melden Sie sich bei Ihrem Shopify Admin-Bereich .
- 2
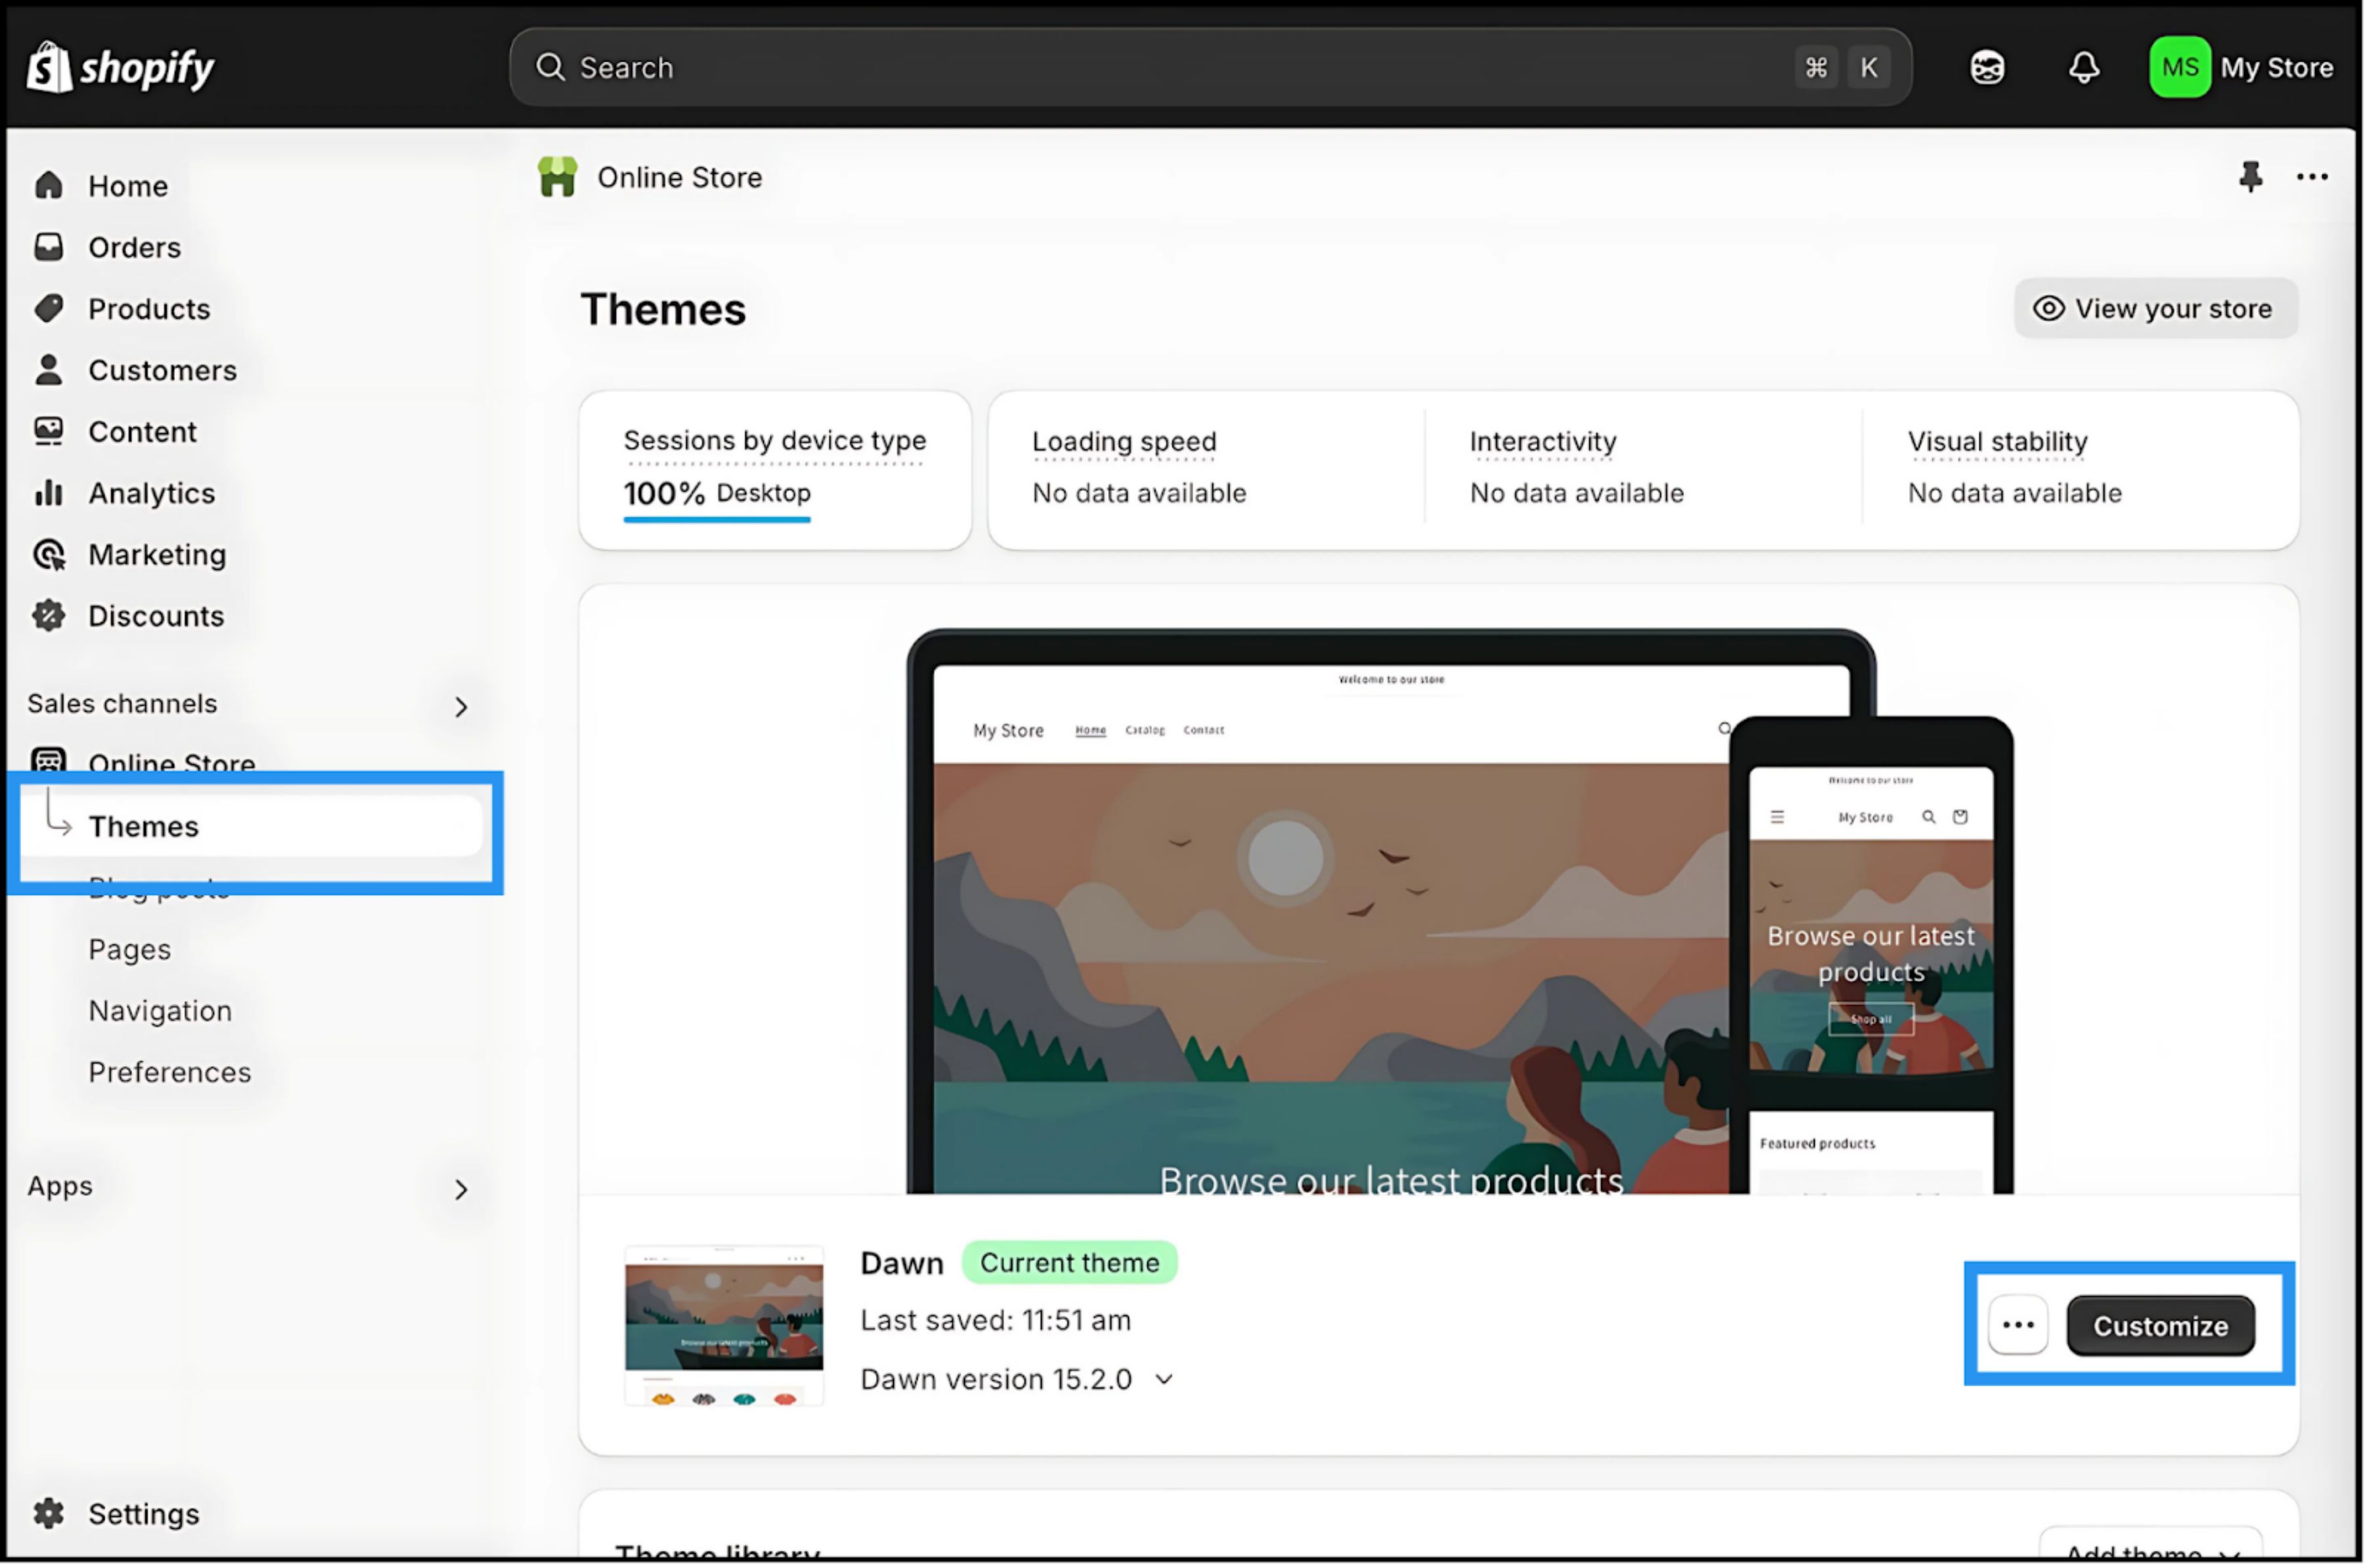
Navigieren Sie zu Online-Shop > Themen .
- 3
Finde dein aktives Thema :( Live ) und klicke auf das Drei Punkte (⋮) Knopf.
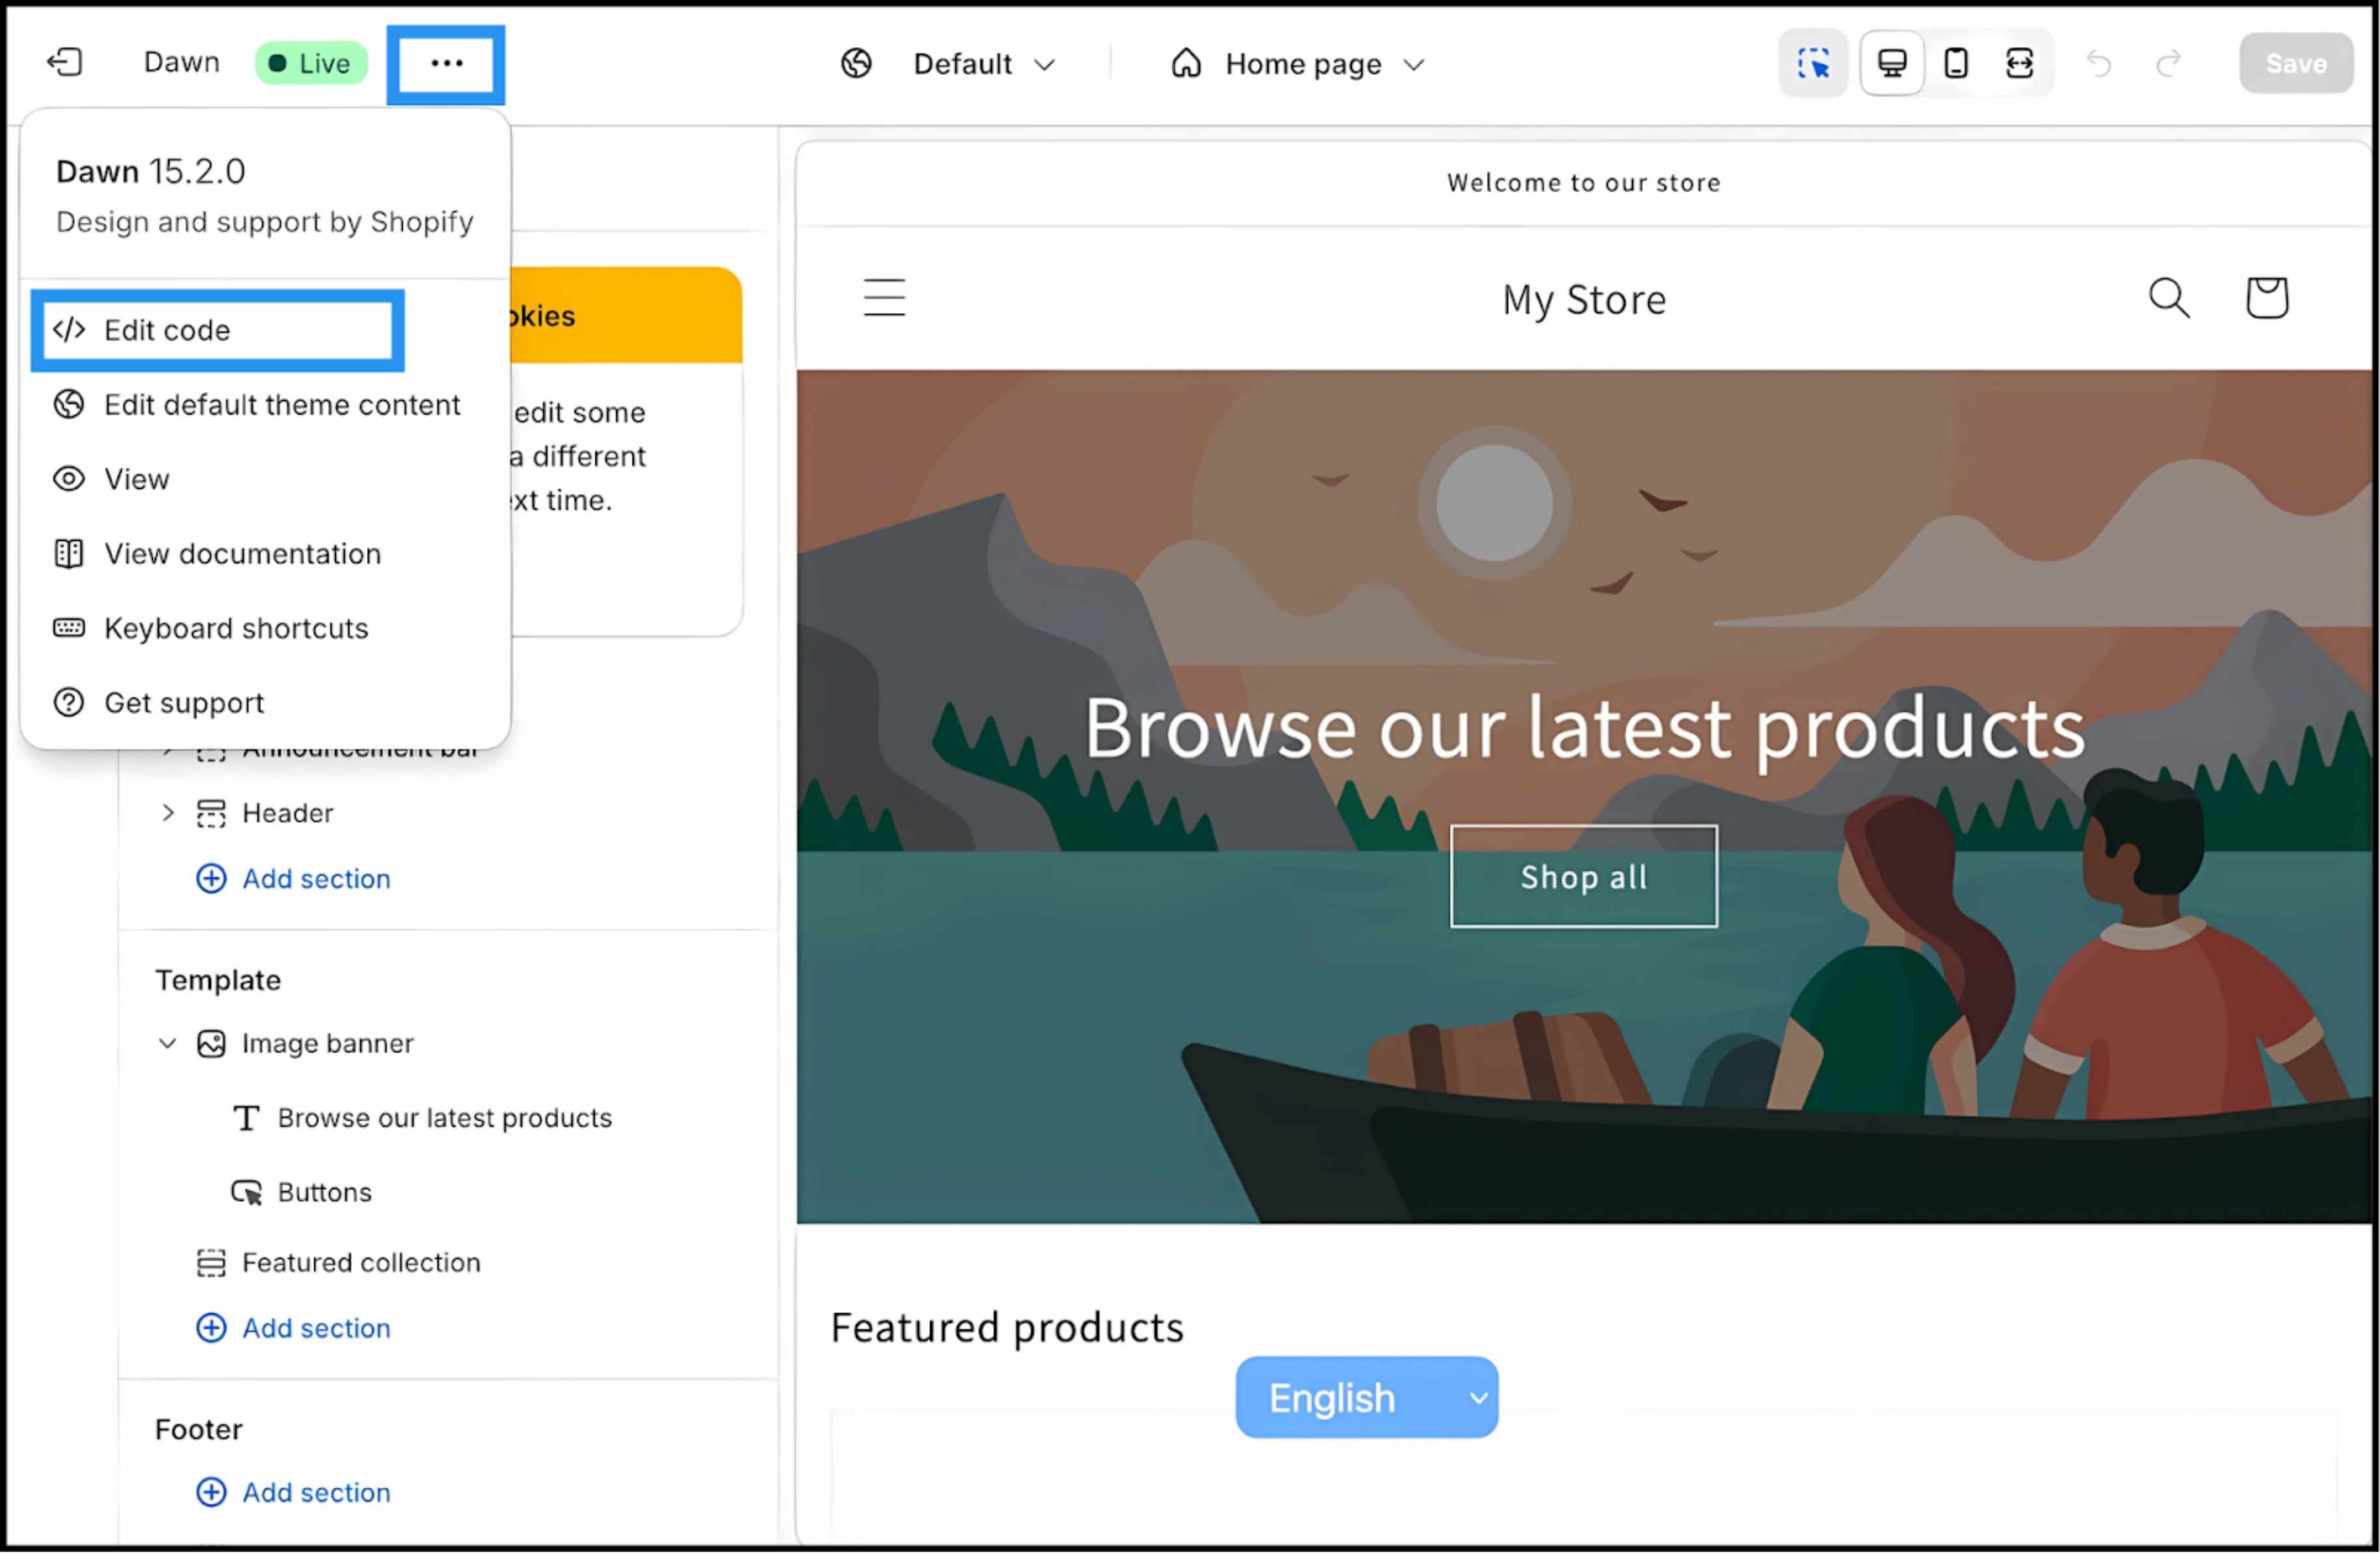
- 4
Auswählen Bearbeitungscode .
3. Schritt 2: Injizieren Sie das Infrastrukturskript
- 1
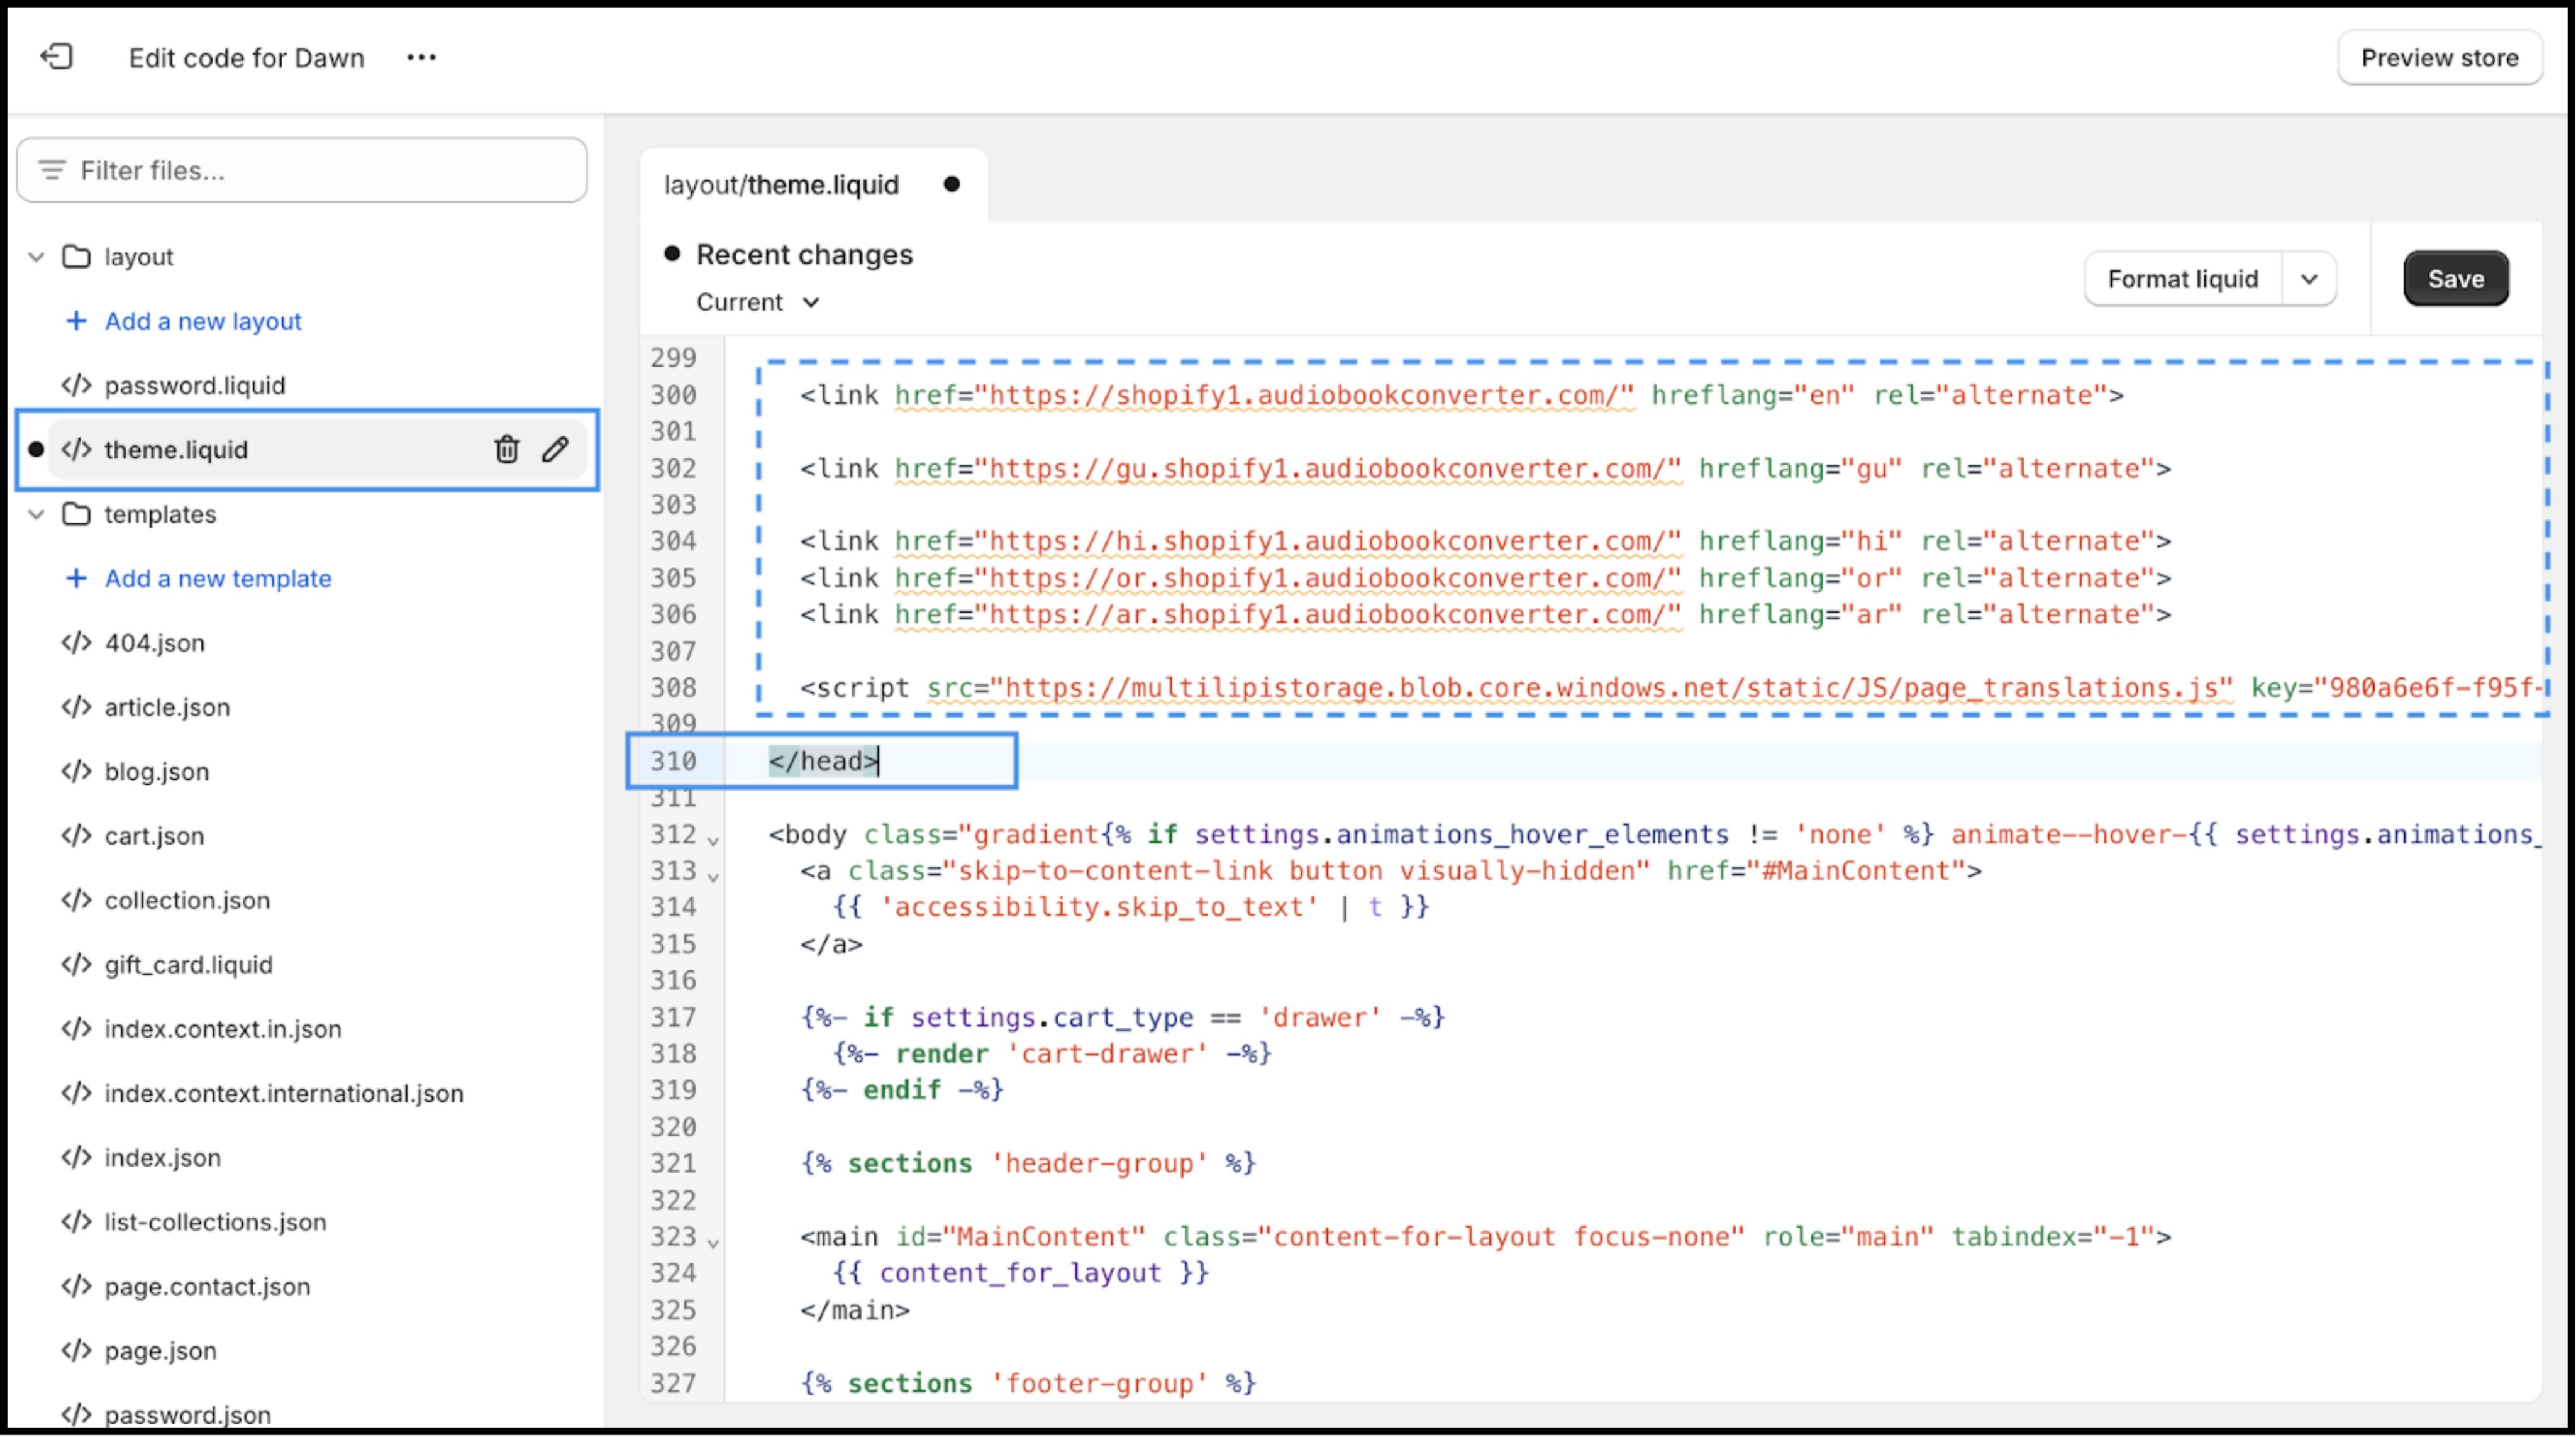
Im Dateiverzeichnis (linke Seitenleiste) finden Sie das Layout Ordner.
- 2
Offen
theme.liquid. Das ist die Hauptvorlage für Ihr Laden. - 3
Scrollen Sie nach unten, um den Abschluss zu finden
</head>Etikett.
Aktion: Fügen Sie das Verbindungsskript ein
Fügen Sie das folgende Verbindungsskript sofort ein oben die </head> Tag:
<script
  src="https://multilipistorage.blob.core.windows.net/static/js/page_translations.js"
  key="YOUR_API_KEY_HERE"
></script>
⚠️Kritische Konfiguration
- • Ersetzen
YOUR_API_KEY_HEREwobei der eigentliche API-Schlüssel von deinem MultiLipi-Dashboard kopiert wurde. - • Klicken Retten oben rechts.
4. Schritt 3: Validierung und Start
Sobald sie gerettet ist, ist die Infrastruktur aktiv.
Open Storefront
Navigiere zu der URL deiner Live-Website.
UI überprüfen
Du solltest den Sprachwechsel in der unteren linken Ecke verankert sehen (Standardposition).
Testübersetzung
Wechsle zu einer Zielsprache. Überprüfen Sie, ob Produkttitel, Beschreibungen und "In den Warenkorb"-Buttons sofort übersetzt werden.
Fehlerbehebungsprotokoll
- • Siehst du den Schalter nicht? Stelle sicher, dass das Skript über dem Abschluss steht
</head>Tag, nicht darunter. - • Caching: Wenn du eine Caching-App von Drittanbietern benutzt, entleere den Cache.
- • Inkognito: Teste in einem Inkognito-/Privatfenster, um das lokale Browser-Caching zu umgehen.
5. Nächste Schritte: Handelsoptimierung
Jetzt, wo die Engine läuft, optimieren Sie sie für den Vertrieb:
Schließen Sie Ihre Marke
Verwenden Sie das Glossar, um zu verhindern, dass Produktnamen oder markenrechtlich geschützte Begriffe wörtlich übersetzt werden.
SEO-Aktivierung
Stellen Sie sicher, dass "Slug Translation" in Ihren MultiLipi-Einstellungen aktiviert ist, damit Ihre Produkt-URLs (z. B. /Produkte/rote Schuhe ) in Zielmärkten indexierte Keywords werden (z. B. /products/zapatos-rojos ).
Checkout-Ausrichtung
Überprüfen Sie, dass Ihre Checkout-Einstellungen in Shopify lokalisierte Felder zulassen, wenn Sie Shopify Plus verwenden.